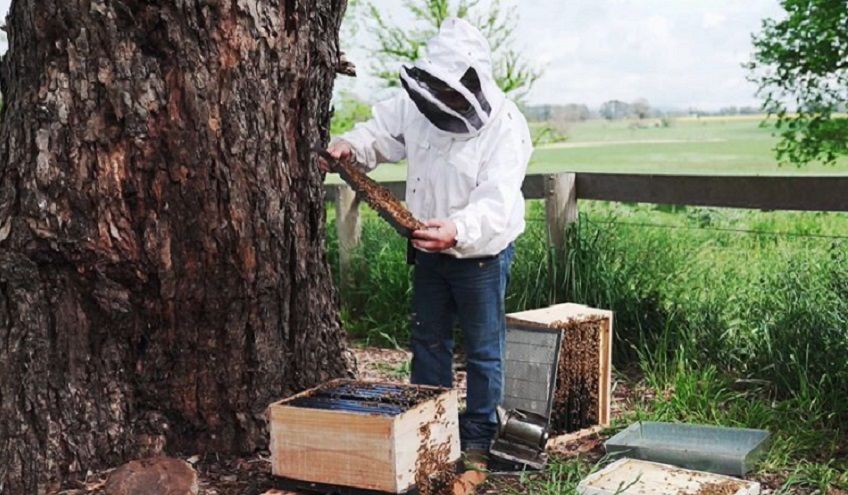
Beekeeping 101: How to do a hive inspection
Bees are secretive creatures. From outside the hive, you can’t tell if they are making honey, the queen is laying eggs, invasive pests are causing havoc or your bees are running out of space. And when you don’t know what’s happening, you can’t help if something goes wrong. That’s why hive inspections are such an important part of beekeeping.
Because it can be quite disruptive to the bees, you shouldn’t inspect your hives too often. Most beekeepers inspect every two to four weeks during spring, summer, and autumn – and more often if they are concerned about an issue. In winter, when bees are far less active, you can leave them alone for a month or two, and only open to quickly check on food supplies. When you start a new hive, open it up after a week to make sure the queen is in place and laying.
If you’re a first-time beekeeper, your first inspection can seem daunting – follow our step-by-step guide to make it simple.
Inspection prep
Before you open your hive, make sure you have all the equipment you need – you don’t want to be hunting for gear with bees buzzing around you. Get into your bee suit, along with your hat, veil, gloves and boots, so you’re protected from stings. Grab your smoker, hive tool, brush, and a notebook and pen for inspection notes.
The best time to inspect your hive is around midday on a clear, still day. At this time the sun will be high in the sky, making it easier to see into the hive, and many bees will be out foraging.
Start your inspection
1: Smoke the hive
Before you open the hive, direct a couple of puffs from your smoker into the main entrance. This disrupts the bees’ pheromones and stops them from sending alarm messages through the hive.
2: Open the hive
Remove the roof of the hive, and the inner cover if you have one. As you do this, puff more smoke into the top of the hive. Bees will respond to smoke by feeding on honey, which makes them full and docile during the inspection.
3: Remove the top box
Remove your honey boxes first, using your hive tool to pry and separate each box before removal. Often the bees will have glued them together with propolis. If you have a double brood box, after prying to separate, carefully lift the box and place it on the ground on top of the roof or hive mat, doing helps to catch the queen if she falls off the frames.
4: Inspect the brood frames
When you reach your bottom brood box, direct some more smoke into the top before you remove any frames.
Lift out frames one at a time using your hive tool, inspect the contents and then place them back in the same slots so they stay in order.
Look for:
- The queen – she will often be found at the edge of a central frame in the brood box. If she’s marked she’ll be easier to find. If not, you might need to spend a bit more time hunting for her.
- Brood – Are larvae and pupae present? Is the queen laying in a good solid pattern or is the brood patchy? Do capping's look healthy (sunken, dark capping's can indicate disease)
- Eggs –these are harder to spot because they are very small. Hold the frame up to the light and look into an open cell – if you can see something that looks like a grain of rice in the centre, your queen is laying.
- Signs of parasites –look for tiny mites on the bees, webs or other insects inside the hive, and sunken, patchy or discoloured brood. If you do spot any signs of trouble, do your research and treat the problem as soon as you can.
If you have a second brood box, place it back on top of the bottom brood box and then complete a brood inspection of this box.
5: Inspect the honey frames
Once you have looked over the brood frames, move on to the honey supers.
You don’t need to spend much time inspecting honey frames – just take a quick look to see how many of the frames are full of capped honey. When stored honey is capped, it’s covered with a yellow-white waxy coating. If most of the frame is coated, it’s full, and if seven or eight of your ten frames are full, it’s probably time to add another honey super.
6: Restack the boxes
Place the honey supers back on top of the brood box carefully – most beekeepers line up an edge and slide the super into position slowly, to avoid disturbing the bees.
Then, replace the inner and outer covers and let your bees get back to work.
7: Record your notes
Notes are vital for tracking changes in the hive, so jot down the date and details. Do it right away, so you don’t forget anything.
Note down:
- Whether you found the queen, and where she was
- If you saw capped brood, uncapped brood and eggs
- How many honey frames were full
- Signs of infestation or disease
- Anything unusual in the hive
Keep your notebook handy, so you can make comparisons during the next inspection.
Keeping an eye on your hive
Inspections are an important way to keep track of your colony, and if you’re a new beekeeper, they also help develop your bee knowledge. Don’t worry: tricky things like handling the smoker, removing frames, spotting the queen and identifying eggs will become second nature after your first few inspections.
Need tools for hive inspections?Check out Ecrotek’s range of quality beekeeping gear now.

